FlashView Quick Start
The essentials in five minutes
Version 1.8.8
1 Getting started
FlashView is a fast image viewer for Windows. Point it at a folder and the pictures are there - no library, no catalog, no import step, and no waiting when you page through them.
Start big. Don't open a single shoot: open the top folder of your whole archive and switch on Recursive in the toolbar. Twenty years of pictures then sit in front of you as one surface, grouped by year and scrollable in one go. Hardly any other program gives you that view, because they all want to build a catalog first. And since browsing costs you nothing, looking for one picture quickly turns into wandering through the lot.
Opening a folder
Three ways in:
- Open in the toolbar, or Ctrl+O.
- The small arrow next to it lists the folders you opened recently.
- From Explorer: right-click an image, Open with, FlashView.
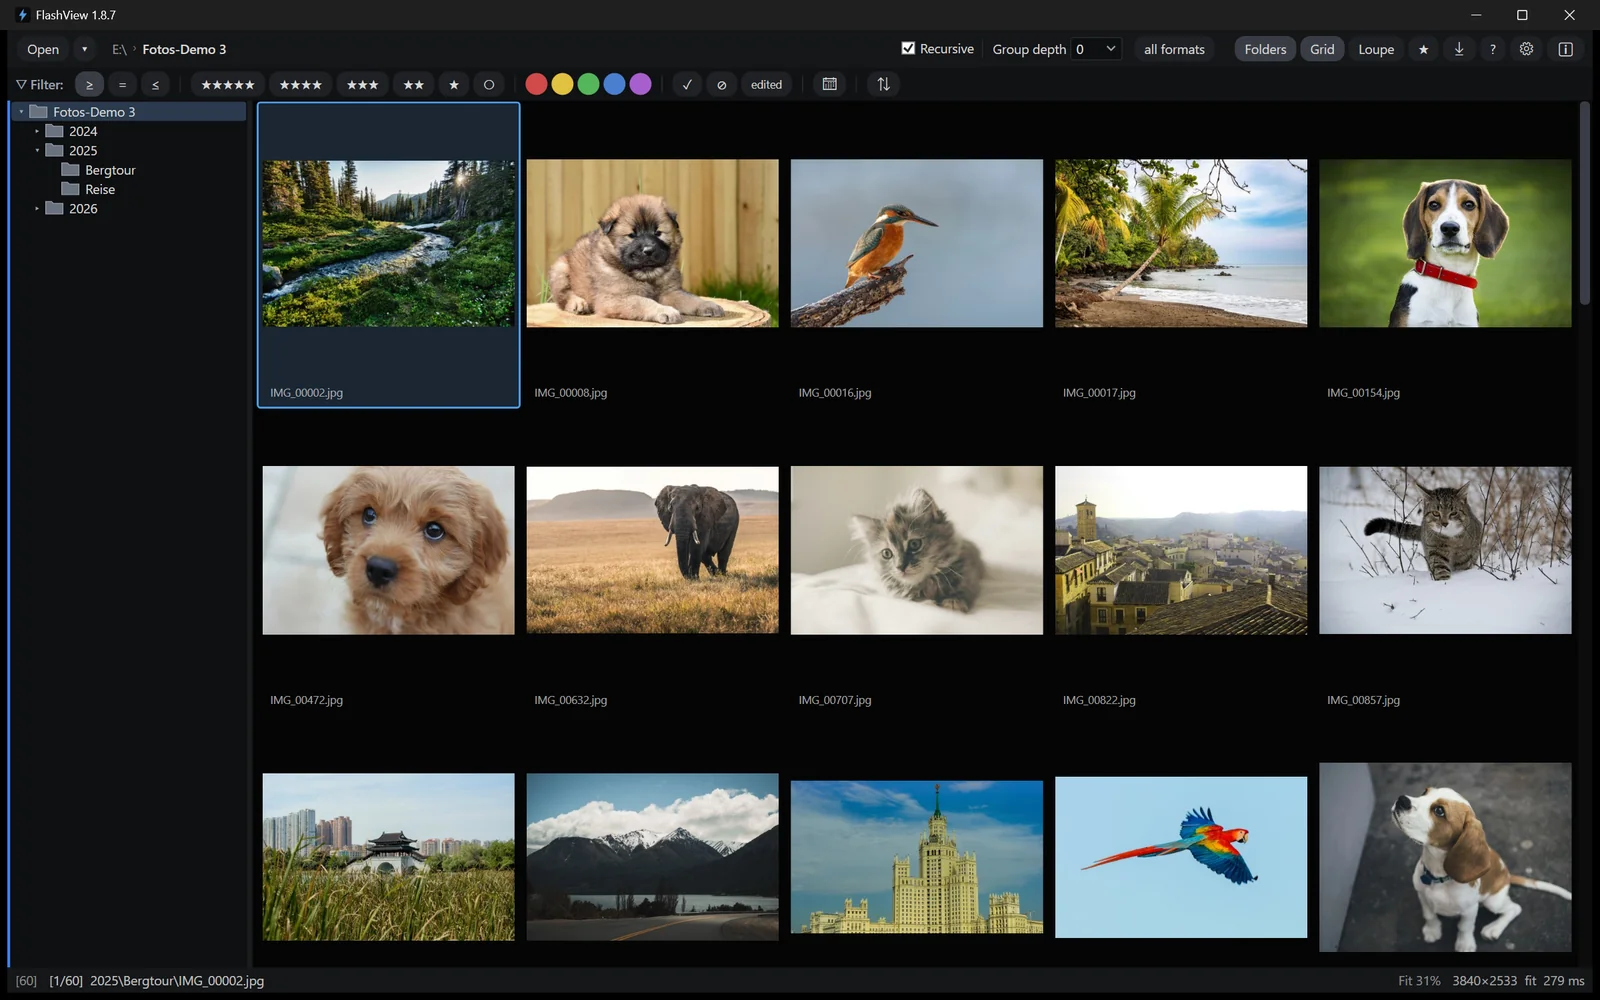
The folder is there immediately, no matter how many pictures are in it.
The folder tree
Your archive sits on the left as a tree. Click a folder and you see its pictures - no need to open anything again. That's how you move from a year down to a single shoot and back.
Shift+T shows and hides the tree; T puts the keyboard focus into it so you can walk through your folders with the arrow keys. By default the tree is visible in the grid but not in the loupe, where the space belongs to the picture. Either setting can be changed at any time and is remembered.
Tab moves back and forth between the tree and your images. Together with G and L for the view, that gets you through an entire culling session without leaving the keyboard.
Viewing and paging
Two views, one key between them:
| Key | View |
|---|---|
| G | Grid - the overview |
| L | Loupe - one picture, filling the window |
← and → page through, Home and End jump to the first and last image. The scroll wheel scrolls the grid and changes the picture in the loupe. Esc takes you back one step.
Ctrl+scroll changes the thumbnail size - skim a series with small tiles, then go bigger when you want a closer look.
Checking focus
In the loupe a single click zooms to 100 %, right where you clicked. Click an eye and you're looking at that eye. Click again for the whole picture; double-click takes you back to the grid.
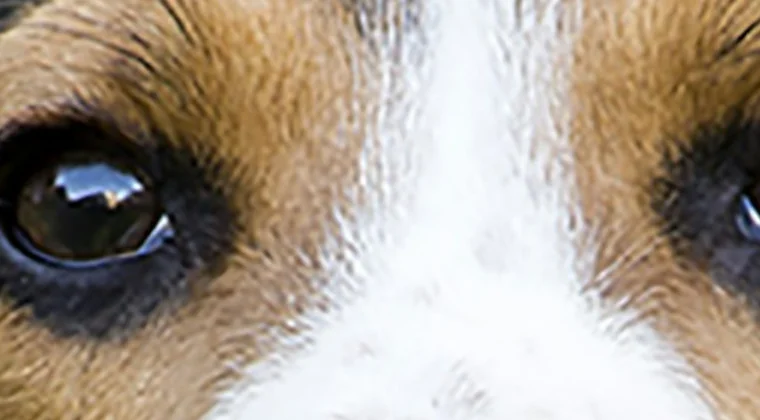
It's the quickest focus check there is: no zooming first and then hunting for the spot you cared about.
2 Culling
This is the part that eats your evening: finding the twenty keepers among two thousand frames. In FlashView it's one key per decision.
Three ways to rate
| Axis | Keys | What it means |
|---|---|---|
| Pick / reject | P · X · U to clear | in or out |
| Stars | 0-5 | how good, 0 clears |
| Color labels | 6 7 8 9 V | red, yellow, green, blue, purple |
They're independent of each other - a picture can carry four stars, a green label and a pick all at once.

Prefer the mouse? R brings up the rating bar and you click straight into it. In the loupe you can also just move the pointer to the bottom edge of the image - the bar appears for two seconds.
Auto-advance
Caps Lock turns on Auto-advance. From then on every decision moves you to the next picture, and culling becomes a single motion: look, key, look, key.
Ctrl+Z undoes the last rating, batch operations included, and jumps back to the picture in question.
Two passes beat one
First pass, nothing but P and X - in or out, no other thought. Second pass, stars on whatever survived. That's far more reliable than deciding everything about every frame at once.
Narrowing down
The filter bar above the grid shows only the pictures you want to see. It filters what's displayed and never touches your files.
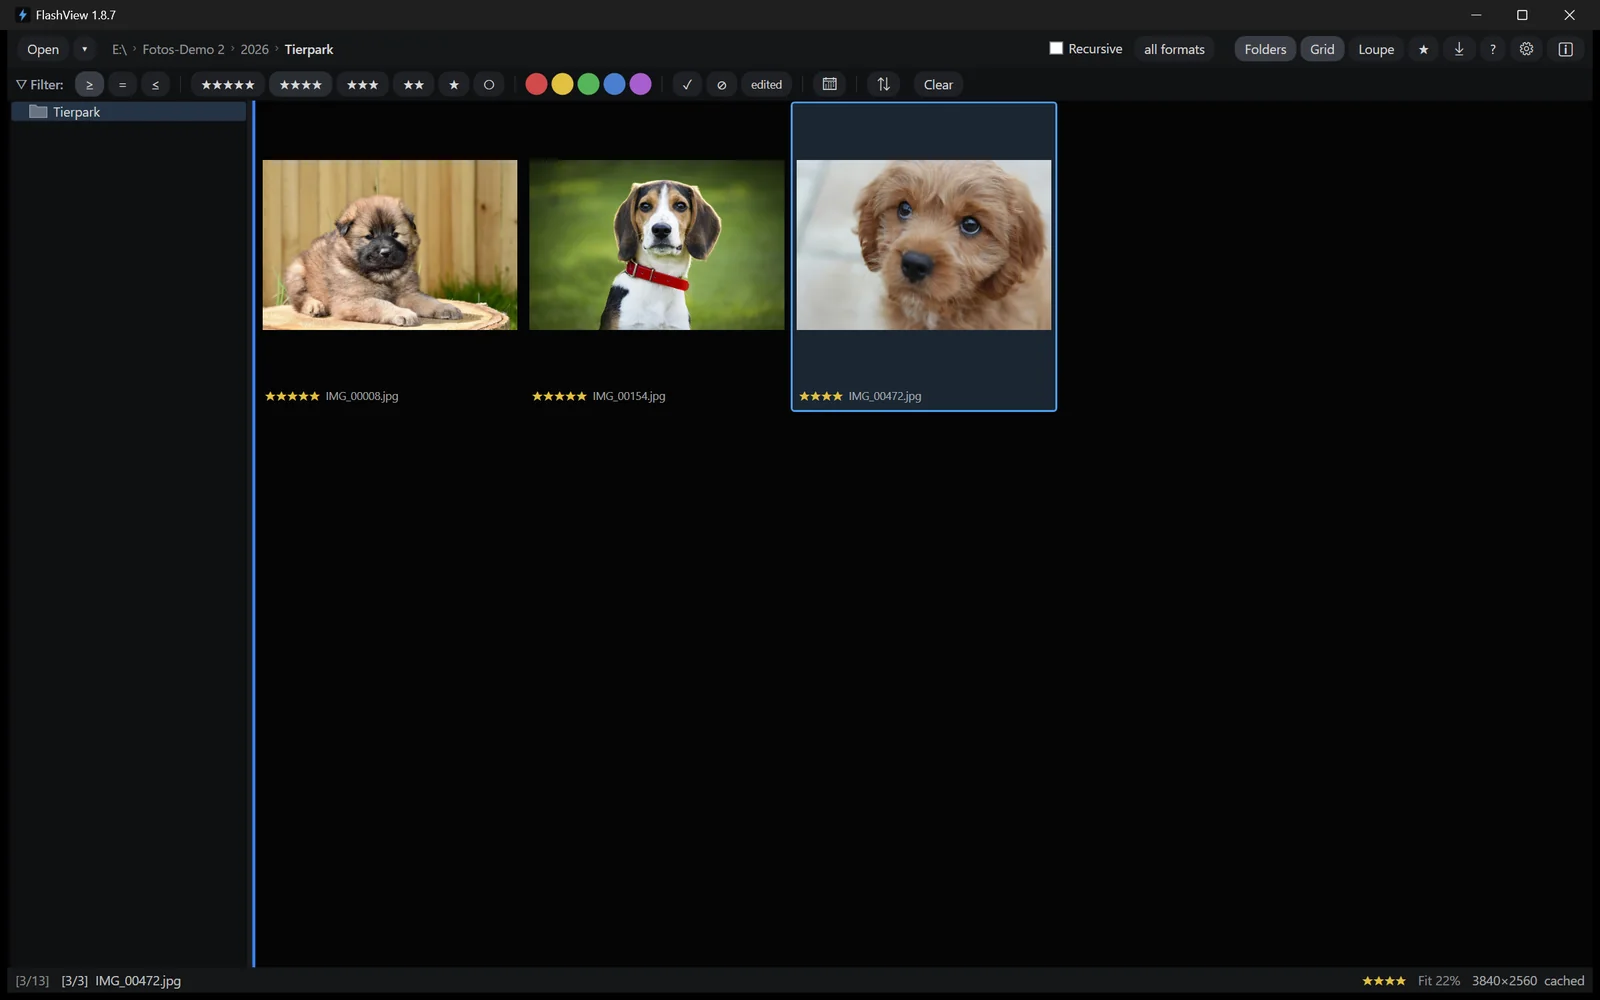
On the left you set the number of stars and whether you mean ≥, = or ≤. Next to that sit the color labels and the switches for picks and rejects. Everything combines.
Clear drops all filters at once.
See the EXIF shot data - and filter by it
I brings up the current photo's EXIF shot data: camera, lens, exposure; H shows the histogram. To also filter by those values (camera, lens, ISO) or sort by capture date rather than file date, tick Enable EXIF sort & filter in the settings - Shift+E then opens the EXIF filter. See the manual for more.
Getting rid of the rejects
Chaining a filter and a selection is the fastest way to tidy up a shoot:
- Set the reject switch ✕ to rejects only - the grid now holds exactly the discards.
- Press Ctrl+A, then Delete.
- Confirm, and everything lands in the Windows recycle bin. Nothing is deleted for good.
Note that Ctrl+A selects the visible images only, meaning whatever your filter left standing. That's exactly why this works.
3 Editing and sharing
A handful of pictures survive the cull. Some of them need a little work - and then they need to reach someone.
A quick edit
E opens the editor for whatever is in the loupe. The tool bar takes the filter bar's place: crop, straighten, redact and the two rotate buttons on the left, Save and Cancel on the right. The sliders for brightness, color and sharpness sit at the top right.

Open a raw file and you get a full raw development instead, using the same sliders, with all the latitude a raw file carries.
The important part: your original is never changed. Your settings are stored as a recipe alongside it, and a finished JPEG is written next to that. You can reopen any edit later and keep adjusting.
E saves and closes, Esc discards.
Sending files out
Ctrl+E opens the export. It exports your selection, or, if you haven't selected anything, everything the current filter leaves visible.
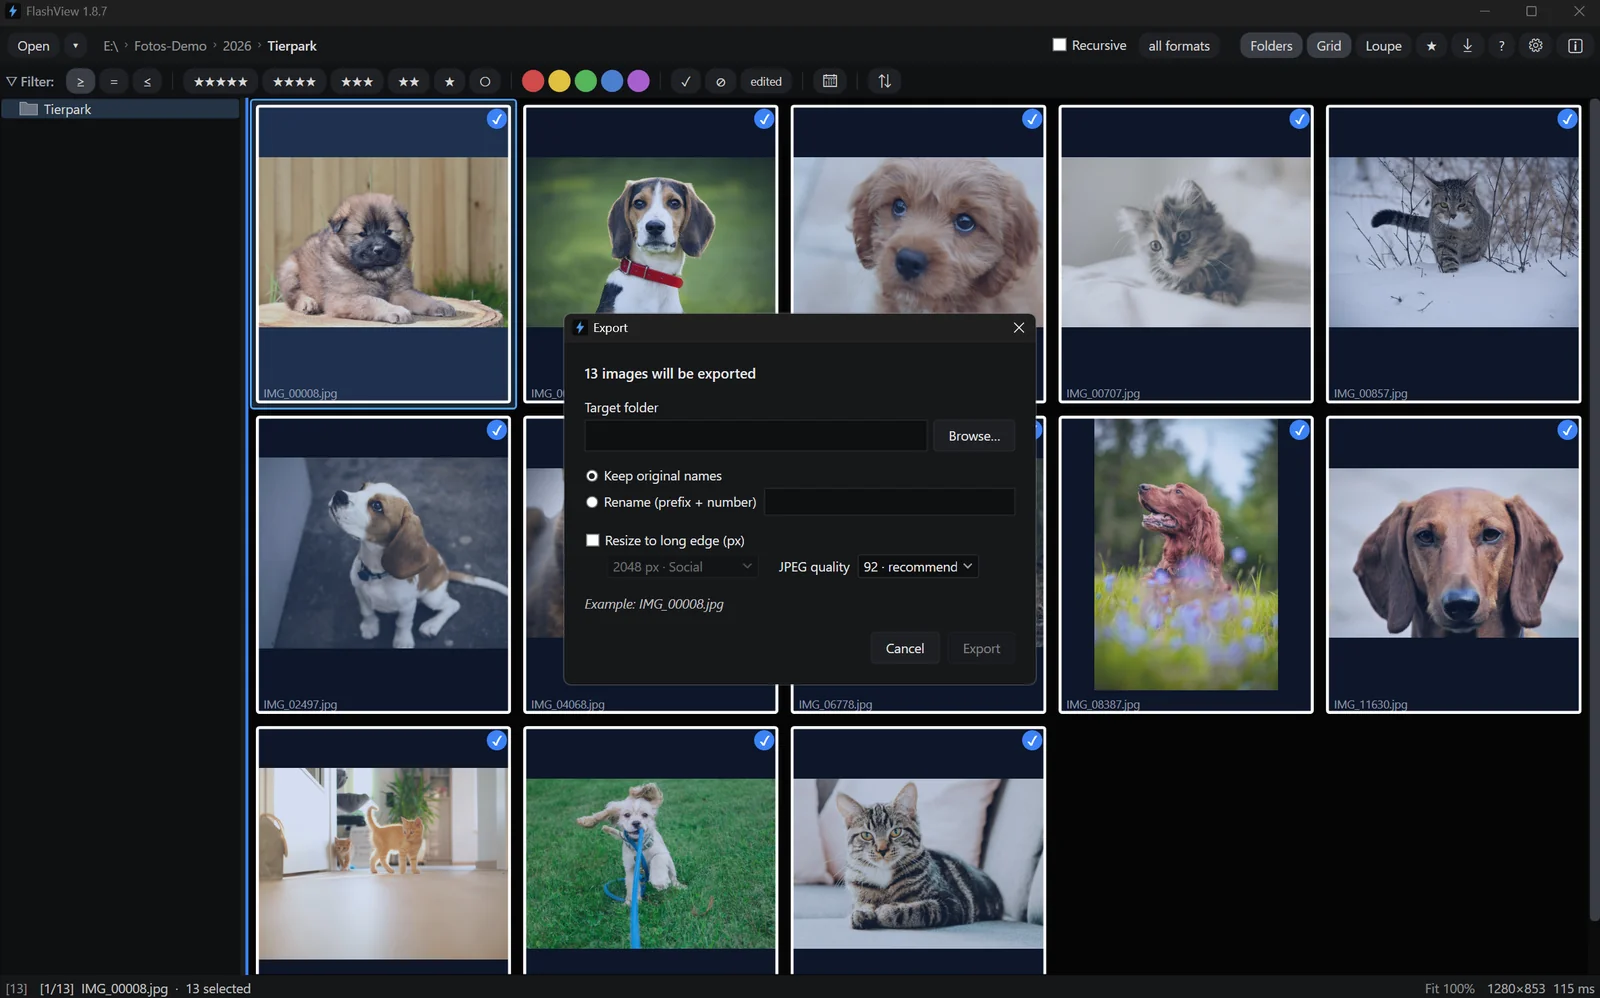
You pick the destination folder, whether to keep the original names or number the files, whether to scale them down, and at what JPEG quality. New files are written; your originals stay untouched.
Or move the files themselves
Sometimes you don't want fresh JPEGs, you want the actual files somewhere else. Use Copy to folder… from the grid's context menu: each picture travels with everything that belongs to it, ratings and edit recipe included.
Just sending one picture
Ctrl+C puts the image on the clipboard. Paste it straight into WhatsApp, an email or a document - no export needed.
4 What else FlashView does
That's everything you need day to day. When you want more, it's there:
| Feature | In short |
|---|---|
| Import from card | Ctrl+I copies the whole card into a dated folder and verifies every file |
| Compare | C puts two frames side by side at matching zoom - for deciding between the final two |
| Search | Ctrl+F finds folders and files across your archive, with no database behind it |
| EXIF shot data | I shows camera, lens and exposure, H the histogram |
| Slideshow | S runs through a selection or a whole folder |
| Second monitor | F11 puts the picture full-screen on the second display while you keep your working view |
| Sorting | Shift+O by name, date, rating, color label or size |
| External editing | Hand a picture to Photoshop; your result comes back on its own when you save |
The full manual covers each of these in detail, along with the settings and license handling. You'll find it at flashview.net.
The shortcuts worth knowing
| Key | Action |
|---|---|
| G / L | grid / loupe |
| ← → | previous / next image |
| F | fullscreen |
| Esc | back one step |
| P / X / U | pick / reject / clear |
| 0-5 | stars |
| 6 7 8 9 V | color labels |
| R | rating bar |
| Caps Lock | auto-advance |
| Ctrl+Z | undo |
| Ctrl+A / Ctrl+D | select all / clear selection |
| Delete | move to recycle bin |
| Ctrl+C | copy image to clipboard |
| Ctrl+O / Ctrl+E / Ctrl+I | open / export / import |
| E | edit |
| C | compare |
| Ctrl+F | search |
| I / H | EXIF shot data / histogram |
| F1 | show shortcuts in the app |
F1 brings this list up inside FlashView whenever you need it, so there's nothing to memorise.